How to Send Invoices, Reports, & Reminder Letters from Tally by E-mail Using Gmail Server

How to Send Email from Tally Using Gmail Server

Share This Post

How to Send Invoices, Reports, & Reminder Letters from Tally by E-mail Using Gmail Server

Recently many users were not able to send email from Tally directly using Gmail server, this is due to update in Security settings in Google Accounts from Google. We now have to configure email sending profile according to new updates to send emails directly from Tally using Gmail Server.

Before the security updates Sending emails using Gmail Server had two options

a) 2 Step Verification

b) Less Secure Apps, Most of the users were sending email through this option, (Less Secure Apps have been discontinued by Gmail recently)

So now we have the option to use 2 Step Verification Feature. In two steps we will see how we can enable 2 Step verification and Configure Email Profile to send Emails directly from Tally using Gmail Server.

1) How to enable 2 Step Verification in Google Accounts.

  • Log in to your account from www.google.com.
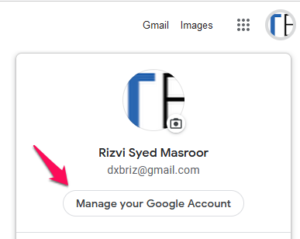
  • Select Manage your Google Account
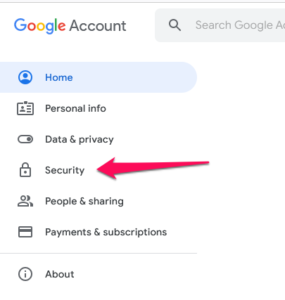
Manage Google Account

  • Click on Security

Manage Google Account Security Settings

  • Enable 2-Step Verification by Signing in to Google Account

Enable 2 Step Verification in Google

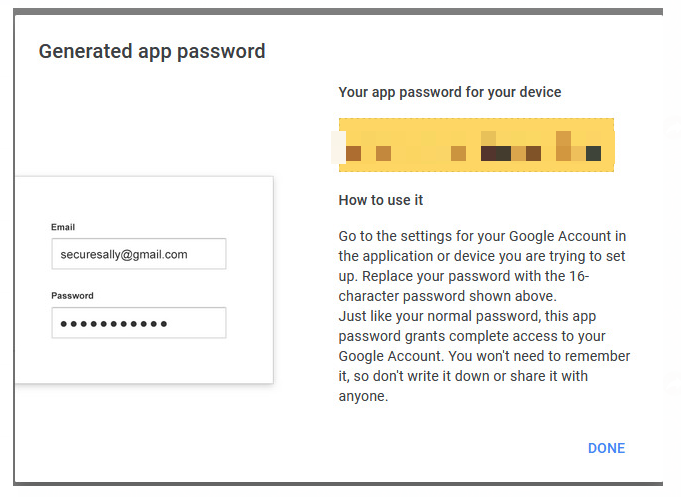
  • Enable App Password by Signing in to Google Account, Select Other option and type Tally and create the app password.

Enable App Password

  • Note the 16 digit App password created, this password will be used to send email using Gmail Server.

Generated App Password


2) Configure Email Profile in TallyPrime

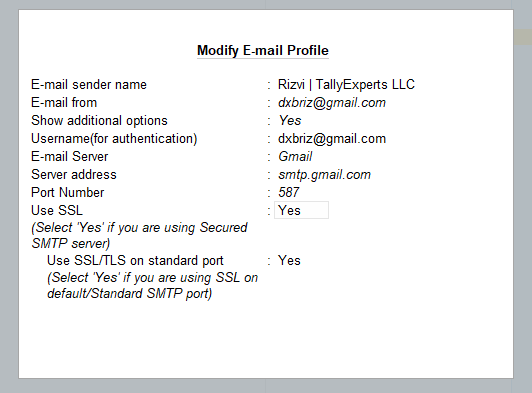
  • Press Alt + M Button in TallyPrime > Configuration > Show More > Pre-Defined Email Profile > Create or Alter the Email Profile, in the profile use the email from and username as your gmail account, email server as smtp.gmail.com, Port Number 587, enable Use SSL and enable Use SSL/TLS on Standard Port.

Tally Email Profile

3) Send any Document or Report and Enter the App Password to send email

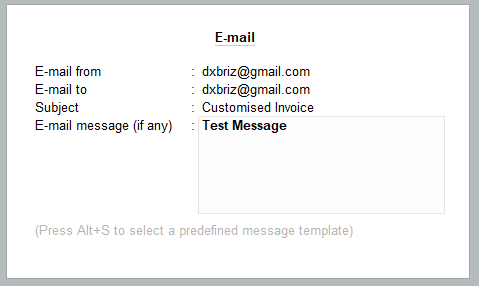
Send email of Document or report directly from Tally using Gmail Server by pressing Alt+M

  • Enter the recipients email

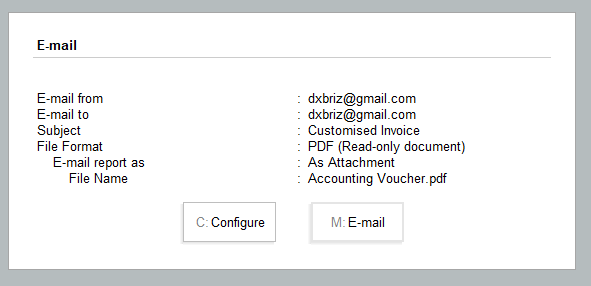
  • Select the File Format as PDF, Excel or HTML from configure

  • Tally will populate the box to enter the Password, enter the 16 digit App password generated in google account here to send the email. This password will not be saved once you quit the application, you have to reenter the app password again when you open Tally again.


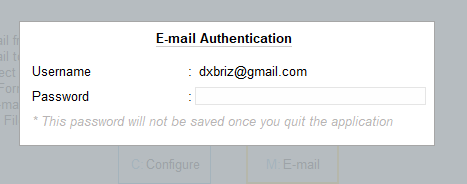
Tally does not save the password due to Intellectual Property rights as the email is the users property, if you want the password to be saved and you don’t have to put password every time, contact us we will by pass this feature through Add On.


Subscribe To Our Newsletter

Get updates and learn from the best

More To Explore

Tally Common Queries

How to add Additional Cost of Purchase on Stock Items in TallyPrime

How to add Additional Cost of Purchase on Stock Items in TallyPrime When we purchase stock items in our business, most of the times we have to pay additional charges on the stock items above the actual purchase price. There are different types of Landed Cost which have to be included in the purchased stock items such as brokerage, logistics fees, complete shipping costs, customs duties, tariffs, taxes, insurance, currency conversion, crating costs, and handling fees on arrival of goods.You will want to know the effective cost of the Stock Items (Cost of Stock Items + Additional cost of purchase) applicable on each stock items. These overheads have to be paid to Supplier or to different Third Party vendors. Very few accounting systems are able to handle Landed Cost but in TallyPrime, we have the flexibility to mention the expenditure on each item in the purchase voucher along with the additional cost of purchase. TallyPrime will automatically allocate the additional cost based on Quantity or Value to each item in the Purchase Invoice. You will be able to assess the exact selling price or value of a stock item that includes the additional purchase cost. Purchase Voucher with Additional Cost of Purchase on Stock Items (Item Invoice Mode) We can implement Landed cost workflow in TallyPrime in 4 simple steps, by Creating Additional Cost Ledgers for each Service, Create a ledger for Additional Cost on Purchase Payable, add additional costs in transaction (item invoice mode), reverse Additional Cost on Purchase Payable entry, Step 1 – Create Additional Cost ledger for each Service Press Alt+G (Go To) > Alter Master > type or select Ledger and press Enter > type or select the name of the purchase or expense ledger and press Enter. Alternatively, Gateway of Tally > Alter > type or select Ledger and press Enter > type or select the name of the purchase or expense ledger and press Enter. The Ledger Alteration screen appears. Method of appropriation in purchase invoice: Appropriate by Qty or Appropriate by Value, based on your business practice. If you do not see this option, then press F12 (Configure) > Select Appropriation Methods to allocate Additional Costs: Yes. Based on the Method of appropriation in purchase invoice chosen by you, the additional cost of purchase will be divided between the stock items accordingly. For instance, if you choose Appropriate by Qty, then the additional amount will be divided by the quantity of stock items in the voucher. On the contrary, if you choose Appropriate by Value, then the additional cost will get allocated to each stock item based on the ratio of values or rate of the items. As always, press Ctrl+A to save. Step 2 – Create Additional Cost on Purchase Payable Press Alt+G (Go To) > Create Master > Select Ledger > type the name of the Ledger Additional Cost on Purchase payable and press Enter > select the group Under Current Liabilities and press Enter. As always, press Ctrl+A to save. Step 3 – Enter the Purchase Transaction with Additional Cost ledger for each Service and Additional Cost on Purchase Payable Press Vouchers  > Create Purchase Voucher  > select Supplier Ledger  and Purchase Ledger Press Enter > type or select the name of the Stock Items, Quantity, Rate and Amount press Enter > . Type or select the each Service ledger and the amount press Enter.for example in this Purchase voucher there are 3 additional cost items, we entered each item separately and the amount. Type or select the Additional cost on Purchase Payable and reverse the total additional cost amount. if we do not enter this Ledger line all the additional amount will be added to the Credit of the Supplier. Additional Cost will be included in the stock Items and the value will impact in the Closing Stock of the items, the Closing stock amount will be increased with the additional cost. We will separately pass the expense entries for each supplied service. As we can see the additional cost is incorporated in the Stock Item Cost,automatically based on the method of cost appropriation selected. From movement analysis and selecting the stock item we can see the effective cost of the item with additional cost details. Step 4 – Reverse the Additional Cost on Purchase Payable Pass the Journal entry to reverse Purchase Ledger with the Additional Cost on Purchase Payable, to get the accurate Purchase Amount, if we do not pass this entry our Purchase Amount will show the value with the additional cost included, which will be wrong in Profit & Loss. Pass the Purchase, Payment or Journal entries for the Services availed for additional cost. After passing all the entries as given in the steps above the profit & loss statement can be verified with the figures, as our example in the purchase transaction the purchase amount is 37,000 it shows the same as in profit & loss, the Closing stock value is increased with the additional cost amount, and our indirect expenses entries also show the correct figure of 7,000/-   If you have any clarification, please message on WhatsApp or call on the given number.   For more information you can visit the given help article If you would like to view more self help articles you can click here.

How to take measurements to Customize Pre Printed Stationery in TallyPrime & Tally.ERP9

How to take measurements to Customize Pre Printed Stationery in TallyPrime & Tally.ERP9   Many Businesses use Pre Printed Stationary to print Invoices from TallyPrime & Tally.ERP9, in addition to Tally default print format, we can add customisation to Print Invoices on the pre printed stationery. To add customisation it is very important to measure the correct dimensions of the document. Lets us see how we can take the correct measurements of the document.   Pre Printed Stationery will come in different Styles and Designs, but normally Printed Stationery will have Five Sections as shown in the image, we have to take measurements from all the sections in order to print accurate document                               1) To take the measurement for Letter Head Section as given in the image below The Letter head section height is the space from the top of the page till the place where the invoice will start printing the customer and invoice details.   Height of Letter Head Section is required in mms   2) To take the measurement for Invoice Hero Section Hero Section of the Pre Printed Invoice contains Customer Details and Invoice details, there are lot of design variations, some invoices have two sections, some have three sections, some contains space for title, based on the design we have to take the measurements, so the hero section of the invoice is programmed. The measurement required is the Height of the Hero Section, Width of the Customer Details section and the Invoice details sections   Height of Hero Section, Width of Customer Details Section and Width of Invoice detail Section is required in mms   3) To take the measurement of Invoice Body Section Invoice Body Sections contains the columns for the Item Description, Quantity, Rate, Amount, the Height of the body section is required and width of all the columns is required.   Height of Invoice body Section and the Width of all the columns  Detail is required in mms   4) To Take the measurement of Invoice Amount Section Invoice Amount section is usually have two parts, one to print Invoice amount in words and one to print the amount in numbers for gross total, discount, vat, round off and Net total of the invoice. the height of the  invoice amount section, width of Invoice amount section in words and invoice amount section in numbers is required.   Height of Invoice Amount Section and the Width of Amount in words and Amount in numbers columns  Detail is required in mms 5) To take the measure of Invoice Bottom Section Space to leave from the bottom of invoice is required in this section.   Height of Invoice bottom Section is required in mms

Do You Want To Boost Your Business?

drop us a line and keep in touch