

You can record the advance amount received from customers in a receipt voucher by marking it as advance receipt. You need to pay VAT for any advance received for goods or services, if the supply is not fulfilled in the same period. When a sales invoice is raised against an advance received in a different tax period, you need to adjust the sales with the advance and reverse the tax liability generated for the advance received.
Advance receipt and tax liability generated if sales is not booked in the same period
- Advance receipt > Raise tax liability
Advance receipt for orders completed in subsequent month
- Advance receipt > Raise tax liability > Outward supply in the next month > Reverse tax liability of advance amount
Advance Receipt from Customer
Record advances received from customers
- Gateway of Tally > Vouchers > press F6 (Receipt).
Alternatively, press Alt+G (Go To) > Create Voucher > press F6 (Receipt).
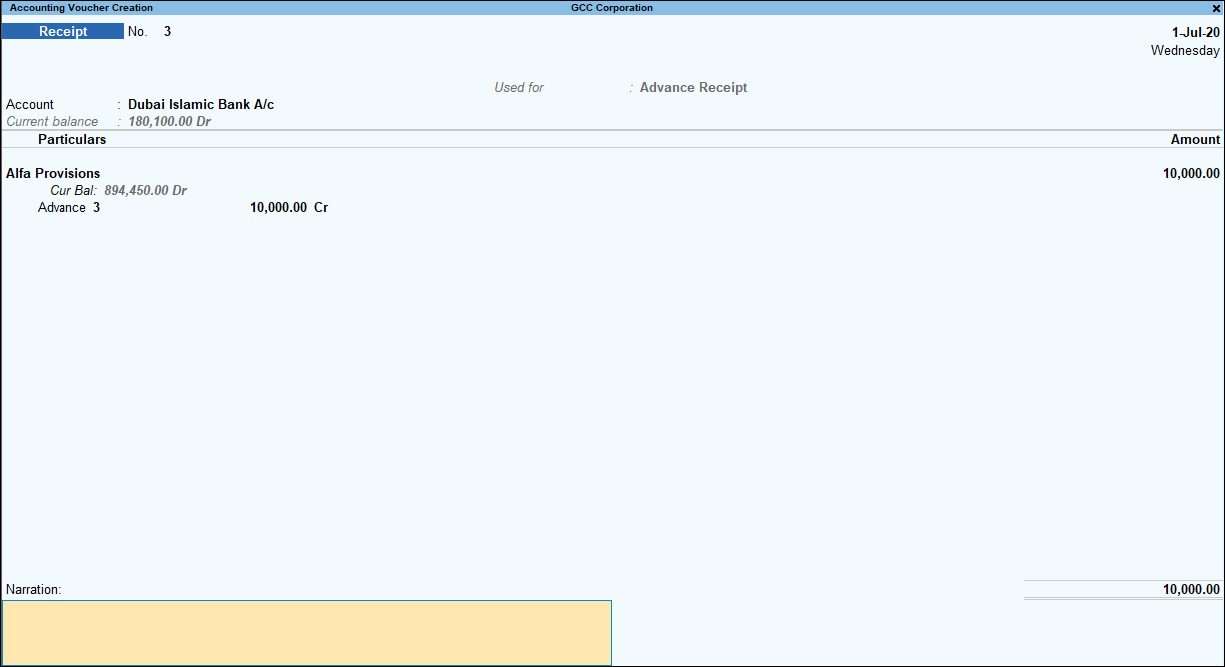
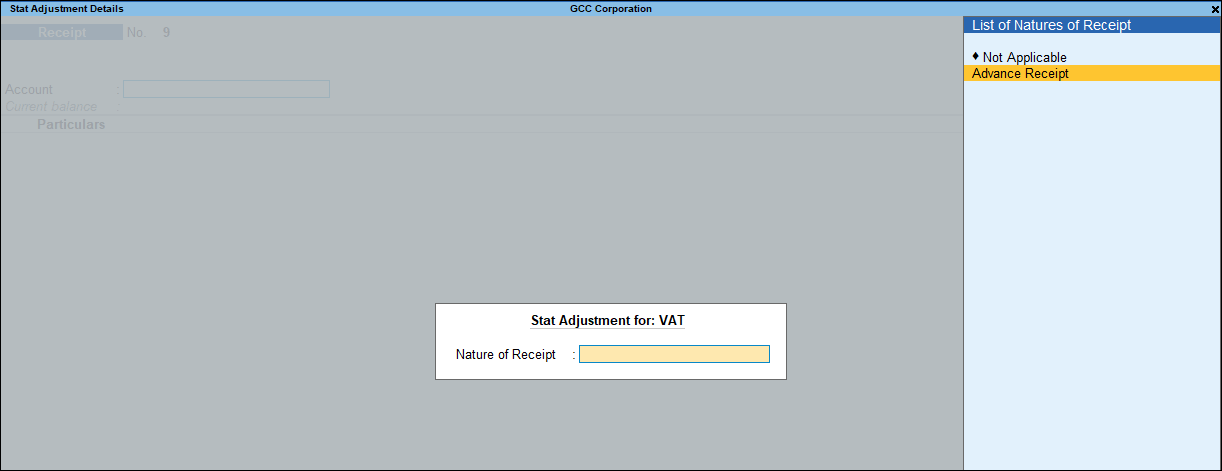
- Press Alt+J (Stat Adjustment) > select Advance Receipt.
- In Account select the bank to which the payment will be made.
As always, press Alt+C, to create a master on the fly. Alternatively, press Alt+G (Go To) > Create Master > type or select Ledger > press Enter. - Select the party ledger. Ensure to enable bill-wise details in the ledger master. The Advance Receipt Details screen appears.
Note: Since advance received from customers for taxable goods or services is liable for tax in the same period, it is important to link the tax liability to the party. Hence, the option Maintain balances bill-by-bill is automatically in enabled in the ledger master of the party selected in an advance receipt transaction, if it is not already enabled. - Enter the tax rate and advance amount details. Taxable Amount and Tax Amount are automatically calculated:
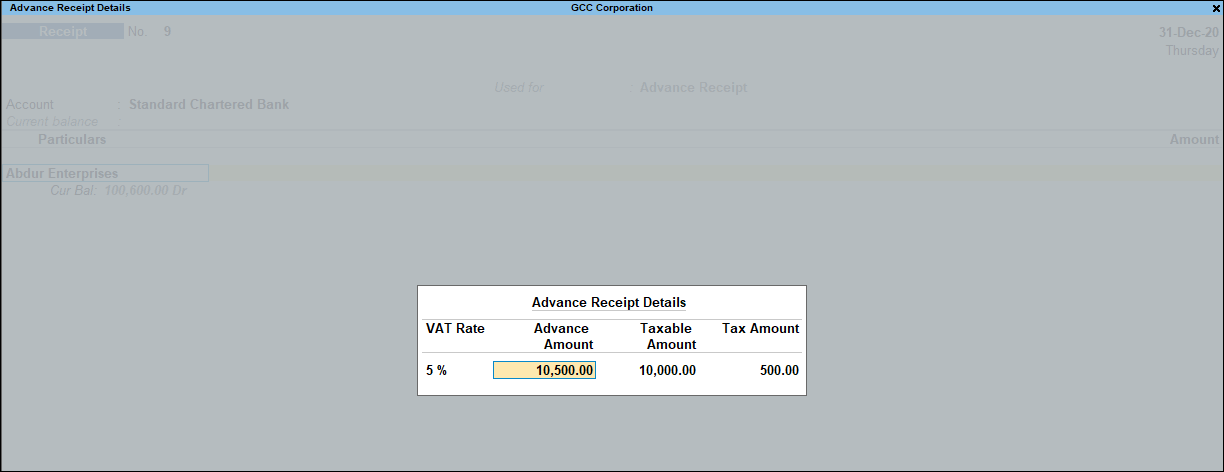
- Press Ctrl+A to accept the Advance Receipt Details screen and return to the receipt voucher.
- Select the type of reference as Advance and enter the reference details in the Bill-wise Details screen.

- Press Enter to return to the receipt voucher.
- Accept the screen. As always, you can press Ctrl+A to save.
Raise tax liability
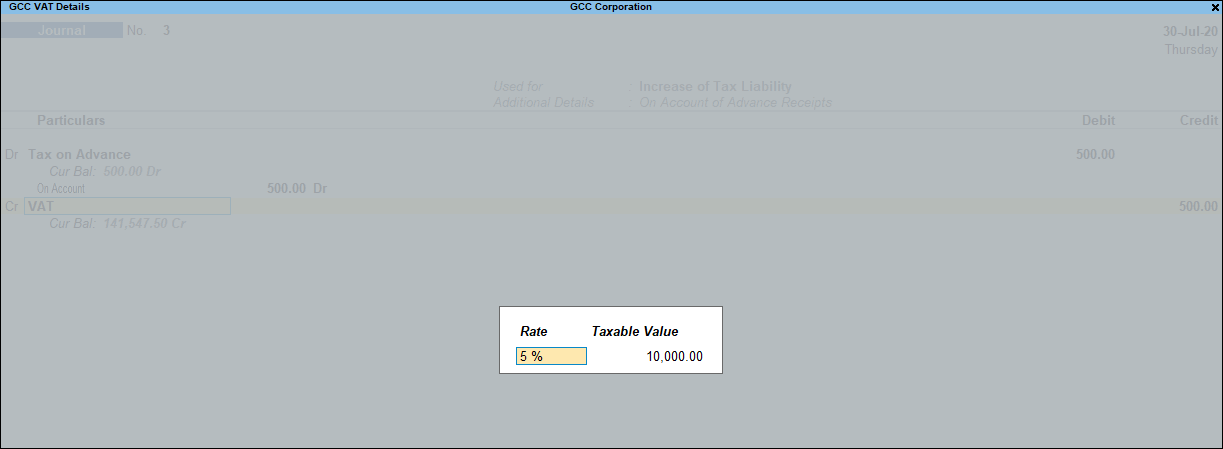
- Gateway of Tally > Vouchers > press F7 (Journal).
Alternatively, press Alt+G (Go To) > Create Voucher > press F7 (Journal).

- Press Alt+J (Stat Adjustment) , select the options as shown below:
- Nature of Adjustment – Increase of Tax Liability.
- Additional Details – On Account of Advance Receipts.
- Emirates – select the name of the emirates linked to the customers address.

- Press Enter to return to journal voucher.
- Debit the expense ledger, or the ledger grouped under Current Assets.
- Credit the VAT ledger for the tax on advance receipt. Enter the tax Rate and Taxable Value in the VAT Details screen displayed.
- Press Enter to save.
- Accept the screen. As always, you can press Ctrl+A to save.
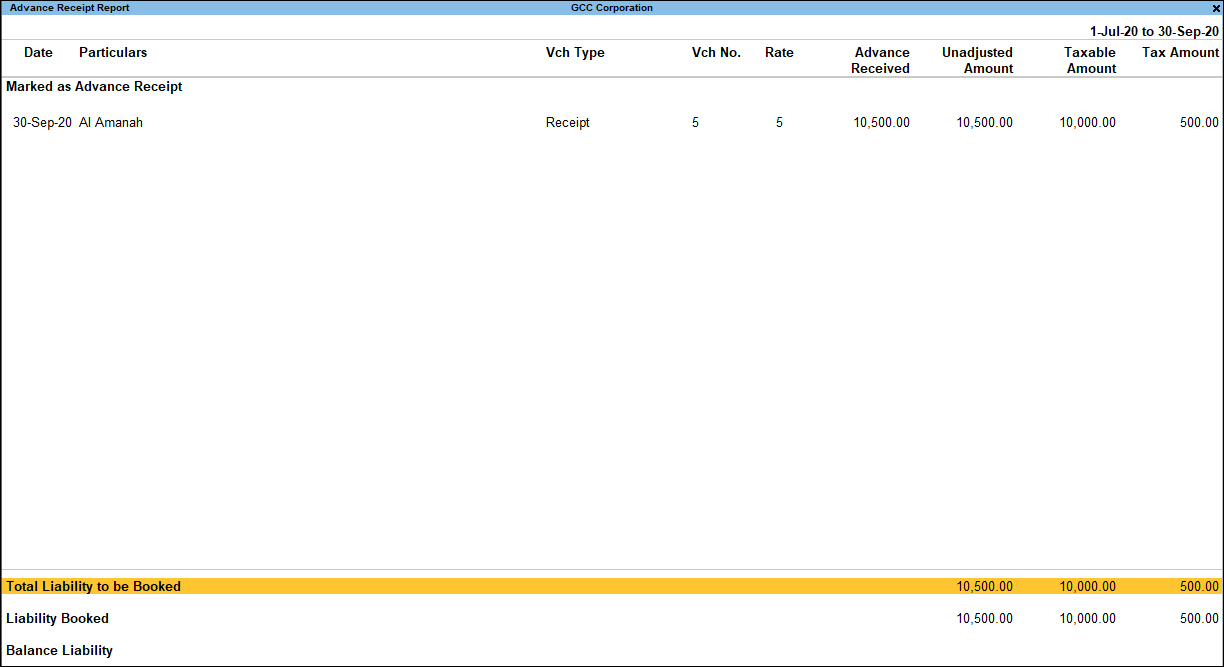
The tax liability raised on the advance amount appears in Advance Receipts Report, as shown below:
Reverse the liability on advance receipt after sales
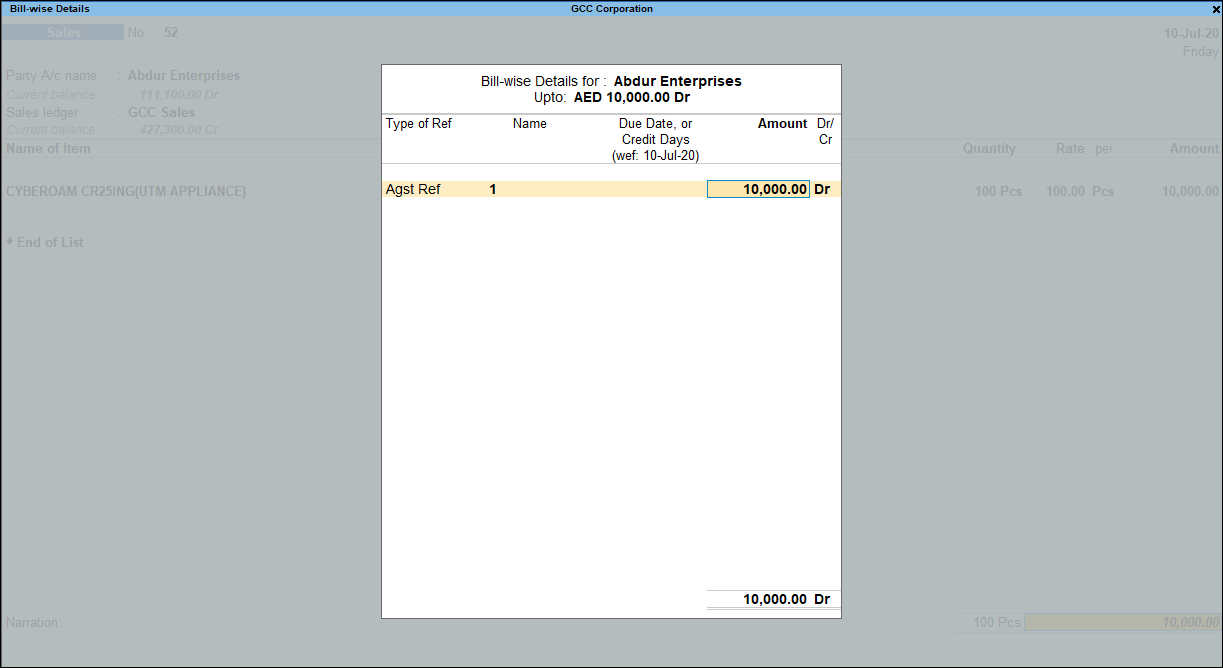
When the sales invoice is recorded, the receipt voucher has to be linked to it by selecting the Type of Ref as Agst Ref in the Bill-wise Details screen of the sales invoice.
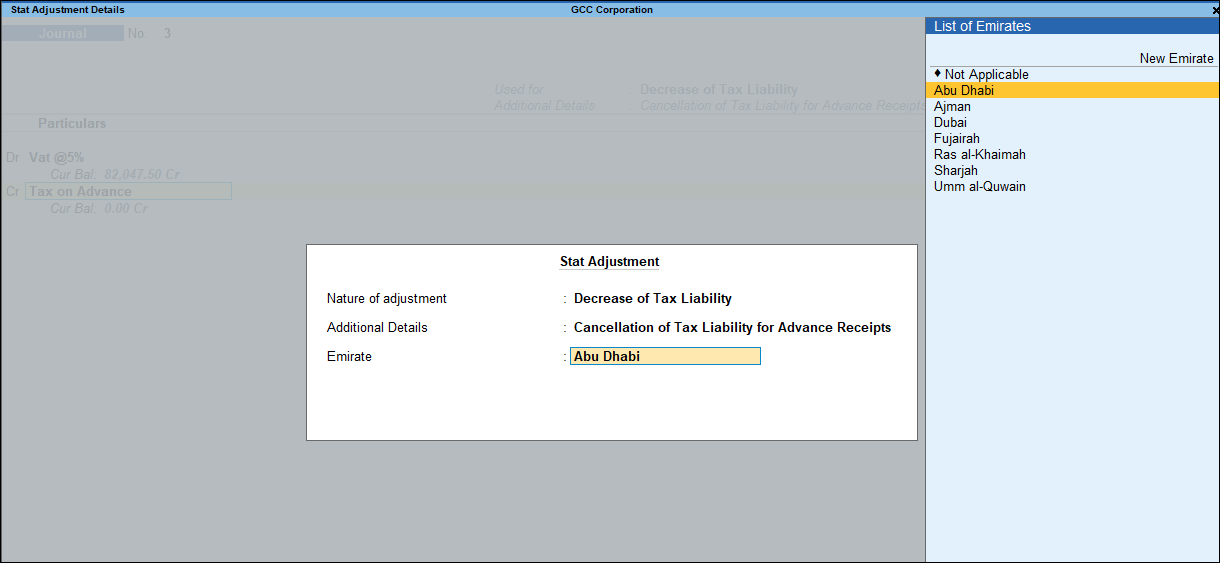
Reverse the tax liability on advance receipts
- Gateway of Tally > Vouchers > press F7 (Journal).
Alternatively, press Alt+G (Go To) > Create Voucher > press F7 (Journal).

- Press Alt+J (Stat Adjustment) , select the options as shown below:
- Nature of Adjustment – Decrease of Tax Liability.
- Additional Details – Cancellation of Tax Liability for Advance Receipts.
- Emirates – select the name of the emirates linked to the customers address.
- Press Enter to return to journal voucher.
- Credit the VAT ledger for the tax on advance receipt. Enter the tax Rate and Taxable Value in the VAT Details screen displayed.
- Debit the expense ledger, or the ledger grouped under Current Assets.
- Accept the screen. As always, you can press Ctrl+A to save.
0 Comments